On a previous post, we talked about Azure Load Balancer: http://azurebrains.com/2019/02/07/azure-load-balancer/ as a tool to distribute requests between multiple virtual machines or Azure services.
Azure Load Balancer can distribute the load using both origin/destination IP addresses and ports. On the other hand, Azure Application Gateway is able to distribute the load based on the 7 layers of the OSI model. With this, we will be able as an example, distribute the load depending on the requests target URL.
We can see a diagram of this functionality below:
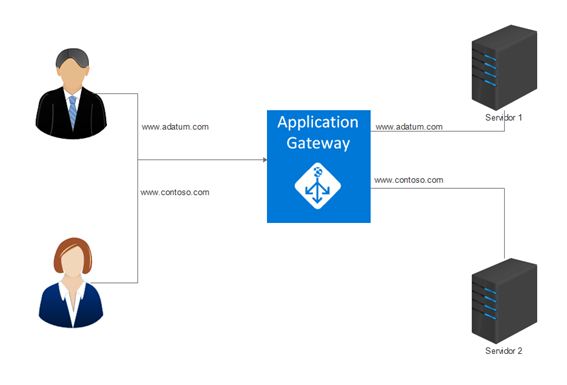
Behind our Application Gateway, we have two web servers that deliver different pages. The first one for the domain “Adatum”, and the second one for the “Contoso” domain. The Application Gateway has a single public IP address on which it will receive the clients requests. The request will be either sent to Adatum server or Contoso server depending on the defined rules.
Azure Application Gateway also includes features such as: SSL termination or WAF (Web Application Firewall), which we will talk about on different posts.
This time we will implement a structure like the one shown on the previous diagram, on which we will have 2 web servers (Ubuntu Virtual Machines instances with Apache installed), that will be part of the Application Gateway backend. We will create the required rules so when a petition is made to www.adatum.com, it will be sent to Server 1, and when a petition is made to www.contoso.com, the petition will be sent to Server 2 instead.
We already have a resource group named RG-AppGW and two ubuntu Virtual Machines.
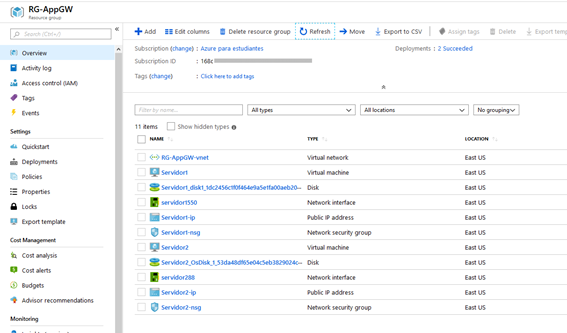
On these VMs (Virtual Machines) we have already installed Apache, and customized the index.html file.


On the same Virtual network on which we are deploying the infrastructure, we will create a subnet that will be used by the Application Gateway, a 28 bits range is enough for this.

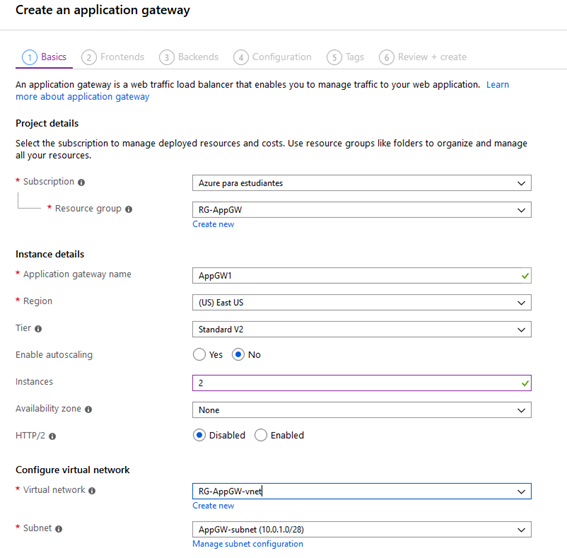
Then, we can proceed to create the Application Gateway. When doing it we will find 4 different options: Standard, Standard V2, WAF and WAF V2.

The V2 SKU items have features like autoscaling, redundancy between multiple availability zones, performance improvements among others that we can check on the following link: https://docs.microsoft.com/en-us/azure/application-gateway/application-gateway-autoscaling-zone-redundant
Also, the billing mode with the v2 items has been changed; now, it does not depend on the amount of instances or its size, but on its usage.
On the region that we will use to do our deployments the prices are:

Where each Capacity Unit is equivalent to 50 connections per second with a 2048 bits RSA TLS certificate, or 2500 persistent connections with a 2.22 Mbps bandwidth each.
We will create the Application Gateway with the following settings:
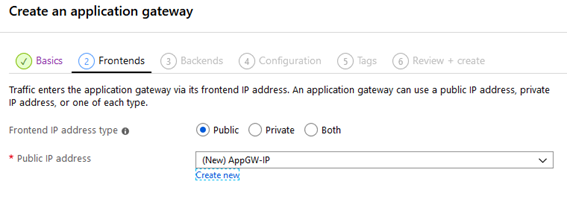
Select Public as Fronted IP address type.
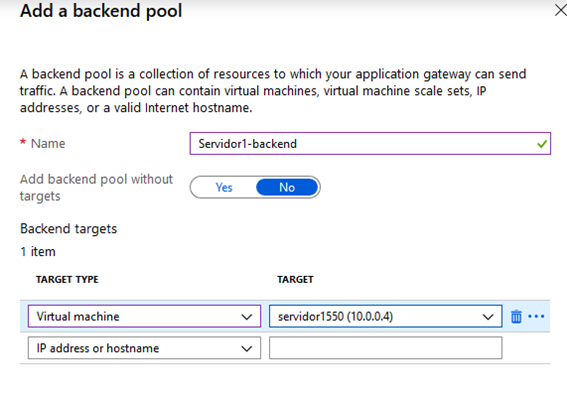
After that, we add Server 1 as our first backend target.
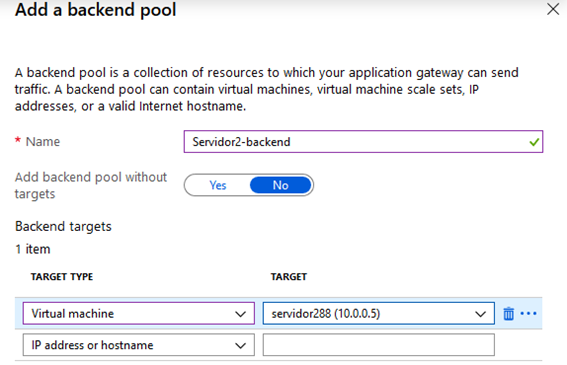
Then Server 2 as the second target:
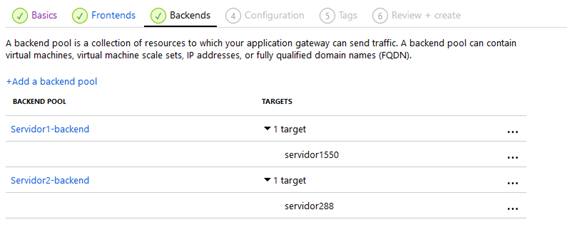
We will end up with this:
And we add the necessary rules for traffic distribution:

We add a rule for www.adatum.com:

We set the listener type as: “Multiple sites” because we will host both adatum.com and contoso.com behind the Gateway.
Then we define a HTTP Setting for this rule:
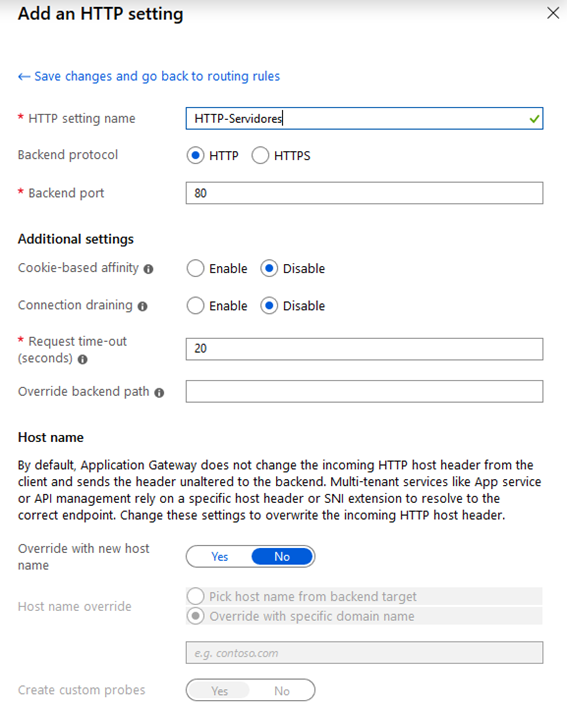
Along with a backend target, which is Server 1 on this case:
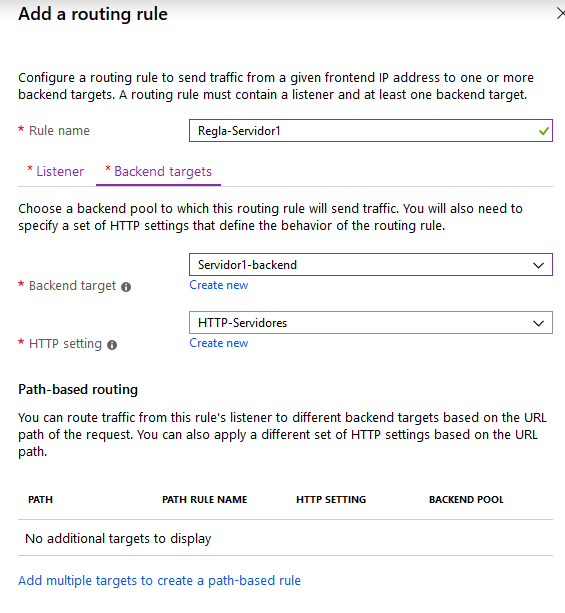
We do the same for Server 2:
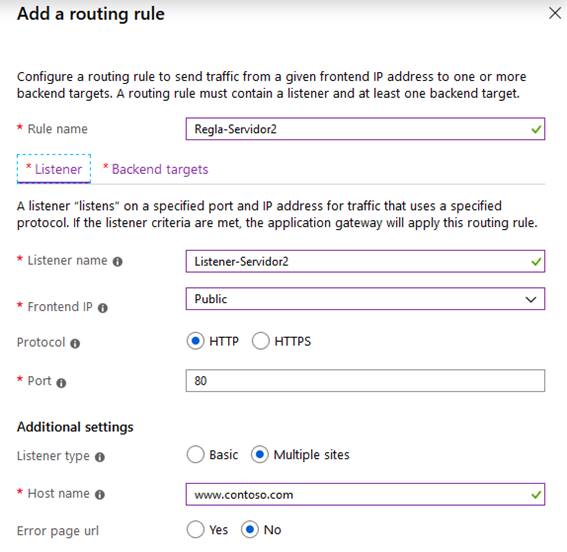

With this done, we will be able to deploy the Application Gateway, what will take a couple of minutes.
In order to check that the rules are functioning correctly, and as we do not own neither the adatum.com nor the contoso.com domains to redirect them to our Application Gateway, we can modify our hosts file. If we have a Windows computer, we need to edit the file under %systemroot%\System32\drivers\etc, then we add the next lines replacing the IP with the one from our Application Gateway.

This way, we can be sure that the traffic will be redirected to the correct backend server depending on the request URL:


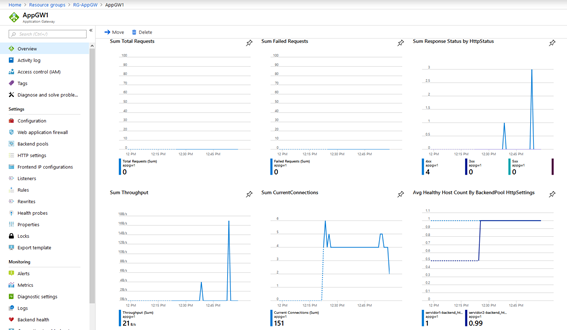
We can also monitor the Application load balancer activity.
Translated by Josué Padilla.


.jpg)
.jpg)
.jpeg)