CHIP-8 emulation with C# and Blazor - part 2
Hi All and welcome back to the second article of the Series! Last time we talked a bit about CHIP-8 and saw how easy it is to write a fully functional emulator in C#.
Today we’ll start from there and integrate the code in a Blazor Webassembly application. So we can run our favourite games in our browser! Isn’t that awesome? Yeah!
Before we go down the rabbit hole, you might want to take a look at my previous articles about Blazor and gamedev. Why? Well, simply because we’re going to use an HTML Canvas to render our CHIP-8 screen.
So if you don’t know already how to use it, here you can find a nice tutorial I’ve put up for you.
Now, in our page all we need is literally this:

It’s basically just the canvas definition, along with some helpful properties (width, height and the ref).
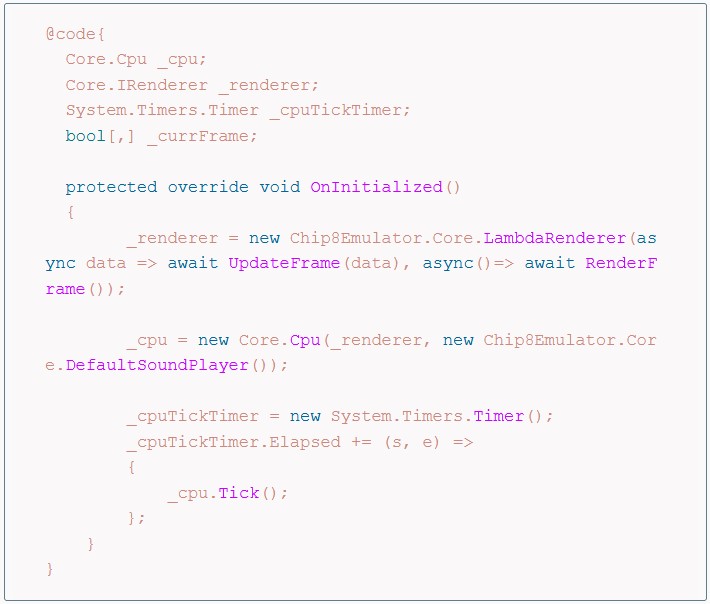
In our C# code instead, things are a little bit trickier, so let’s go step by step. We can start by initializing the CPU and some other utilities:

The LambdaRenderer is a nice handy class that holds two delegates, one responsible for updating the framebuffer and another one for rendering it on screen. We’ll see the method implementations in a moment.
The _currFrame array holds…well…the current frame. Just that. It’s basically a matrix where each cell represents a pixel on the screen. And of course, since we’re using colours, booleans are just enough.
The Timer instance is instead necessary in order to get full control of the CPU clock speed. This way we can completely decouple it from the Canvas update/render loop.
Speaking of which, its code is actually pretty simple:

Let’s not forget the [JSInvokable] attribute, or we won’t be able to see anything on the screen. Why? Well, you would know if you went through my Blazor gamedev posts!
We’re also making sure to store the current canvas size, we’ll need that to compute the size of our pixels.
Now let’s take a look at the actual rendering code. The first thing we have to do is getting a hold of the current frame, which we can easily do in the UpdateFrame() method:

This method will be called directly by our emulated CPU, as a consequence of the 0xD opcode.
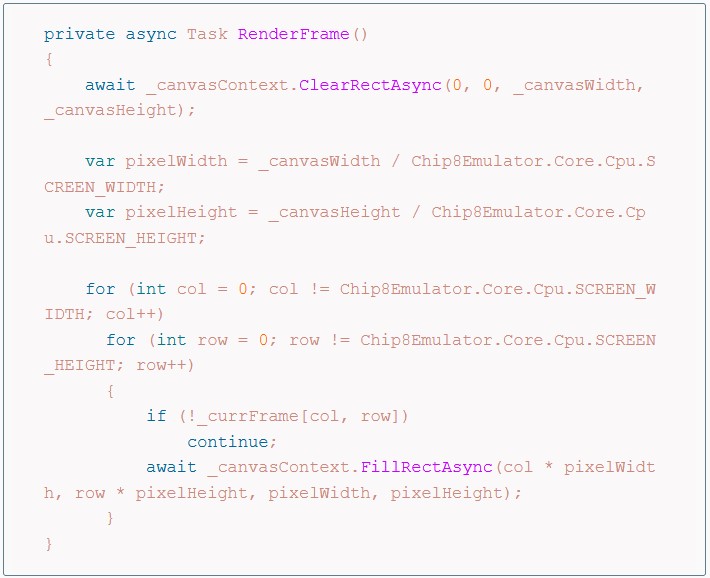
Once we have a hold on our frame, we can display it on the screen:

Here we start by erasing the screen, then we loop over the pixels matrix and for each active one we draw a green rectangle.
And guess what, it actually works!
…also guess what, it’s incredibly slow! So how can we do better? Can we actually do better? We’ll find out in the next article!


